 Tokyo Go-Kart Tours
Tokyo Go-Kart Documents Checklist: Papers, Clothes and Timing Before You Ride
Consider this your go kart tour Tokyo documents checklist: the papers, the shoes and the timing that a Tokyo check-in counter actually demands. You need three things to drive a street kart in Tokyo: a physical 1949 Geneva Convention format International Driving Permit booklet, your passport, and the right shoes. That is the core checklist, and the paperwork part trips up more travelers than anything else on the itinerary. Online copies, photos, photocopies and card-style licences are all rejected at check-in. Every listing states that drivers who arrive without the accepted documents cannot join the ride and receive no refund, so the papers matter more than the weather forecast. This page walks through each document, the dress rules that are actually enforced, the full day-of timeline from your hotel to the kart, and the booking details worth a second look. It ends with a price and duration comparison across the tours. For the wider picture on routes and neighbourhoods, see [the side-by-side Tokyo go-kart comparison and use this checklist to prepare for whichever ride you pick.
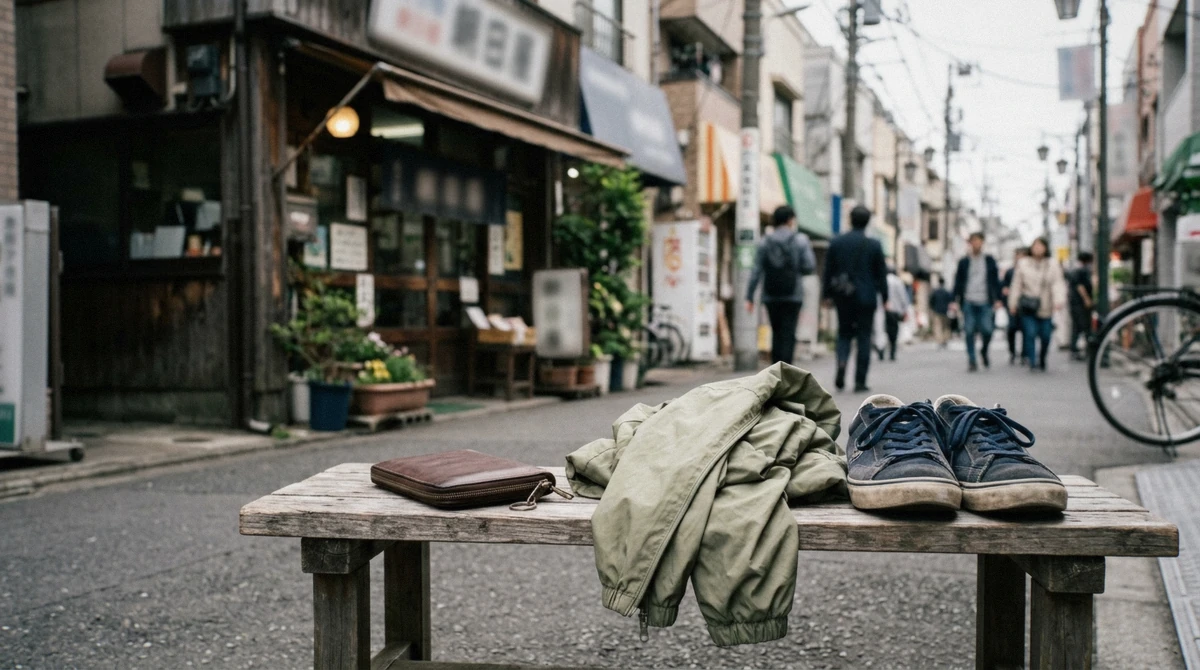
The last walk before check-in. Photo: Bject, CC BY 4.0, via Wikimedia Commons
Quick answer IDP booklet, passport, closed shoes, 30 minutes early: the full check-in list
Bring an original paper IDP booklet in the 1949 Geneva Convention format, your passport, and closed shoes with no heels. Drivers must be 18 or older with a valid car licence, and staff check the physical documents at the counter. Arrive 30 minutes before your start time, because check-in, document verification, lockers, costume pick and the safety briefing all happen in that window. Turned-away drivers receive no refund, so get the permit at home from AAA, the AA or your national motoring organisation before you fly.
Key takeaways
- Only the physical paper IDP booklet counts, and photos or photocopies fail at the counter.
- The 30-minute pre-departure window is where documents, costumes and the briefing all happen, so plan your hotel departure around it.
- If your licence is from Germany, France, Taiwan or another country outside the 1949 system, read [Do You Need a License to Go-Kart in Tokyo? IDP Rules Explained] before booking anything.
- IDP booklet, passport, closed shoes, 30 minutes early
The Documents Checklist Before You Fly
Japan does not accept every foreign driving document. Street kart tours run on public roads, so the rules are the same as for any rental car. The accepted paperwork depends on where your licence was issued, and the check happens in person at the counter with the physical originals in your hand.
- A physical 1949 Geneva Convention International Driving Permit booklet, signed
- Your passport, for the counter check
- Your domestic driving licence, alongside the permit
- The booking confirmation email on your phone
- Closed shoes and clothes you can move in
- A 1949 Geneva Convention format International Driving Permit, as the physical paper booklet signed by the holder
- Your passport, carried on the day of the ride
- A domestic car licence is not enough on its own for most countries, the IDP sits on top of it
The permit must be the paper booklet. Online copies, photos, photocopies and card-style licences are named invalid on the listings and are rejected at check-in. There is no flexibility here and no appeal on the day.
Seven licence-issuing places sit outside the 1949 convention booklet system: Switzerland, Germany, France, Taiwan, Belgium, Monaco and Slovenia. If your licence comes from one of them, the check-in counter does not want an IDP at all. It wants an official Japanese translation of your domestic licence, issued by the Japan Automobile Federation (JAF), together with the licence itself.
Sort the translation before you fly: JAF offices in Japan can issue one, but the counter turnaround is not a same-morning errand.
Licences from Switzerland, Germany, France, Taiwan, Belgium, Monaco and Slovenia sit outside the 1949 system. Holders need an official JAF Japanese translation of their domestic licence instead of an IDP. The translation must be arranged before you ride, and JAF is the issuing body.
A harder group: licences from China, Indonesia, Mexico, Qatar and Saudi Arabia cannot be used to drive in Japan under any paperwork. If your licence is from one of those countries, a street kart tour is not available to you.
The permit cannot be issued inside Japan, and it cannot be issued online after arrival. The motoring organisation at home, AAA in the United States or the AA in the United Kingdom among them, is the only issuer, and the processing time is measured in days to weeks. Travellers who discover the rule at the check-in counter have exactly two options: watch the ride leave without them, and take the no-refund outcome the listings state in writing.
IDPs cannot be issued inside Japan or online after arrival. They come from the motoring organisation in your home country, such as AAA in the United States or the AA in the United Kingdom. Some allow walk-in processing in a day, others post the booklet, so start weeks before your flight.
The full rule breakdown is in [Do You Need a License to Go-Kart in Tokyo? IDP Rules Explained].
The Paperwork That Fails at Check-In
Most document failures are preventable and follow the same few patterns. If you know them, you will not repeat them.
- Bringing a photo of the IDP on your phone instead of the booklet
- Bringing a photocopy of the booklet while the original sits at the hotel
- Using a 1968 Vienna Convention permit, or an IDA or IAA document, none of which are valid for driving in Japan
- Forgetting that a card-style licence format is not accepted even when the information on it is correct
- Assuming a JAF translation is optional for Germany, France, Switzerland, Taiwan, Belgium, Monaco or Slovenia licences, when it replaces the IDP entirely
- Leaving the passport at the hotel because you only packed the permit
The consequence is stated plainly on every listing. Drivers who arrive without the accepted documents cannot join the ride and receive no refund. That makes the document check the highest-stakes part of the whole booking, more than cancellation windows or weather.
One reviewer, Amy, noted that she would have done the tour again if the rest of the family had had international drivers licences. That is the common shape of the problem, not the kart, not the price, but the booklet that never got ordered.
Clothes and Shoes: The Dress Rules That Are Enforced
The dress rules exist because you are operating a vehicle on real roads in an open kart, not posing for photos. They are checked at the shop before you are handed the keys.
- Cellphones while driving, on every listing
- Alcohol and any intoxication, refused at check-in
- High heels, sandals, flip flops and slippers
- One route adds long skirts to the caution list
- High heels
- Sandals
- Flip flops
- Slippers
- Long skirts, banned on one listing as part of its caution list
Closed shoes with a flat sole are the safe default. Think trainers or sneakers. Everything else risks being turned away at the shop, and the no-refund rule applies to the whole booking.
Closed shoes with a firm sole, clothes that tolerate wind and sun, and layers you can shed at a stop. The karts are low and fully exposed, so the dress code is less about style than about what stays on your body at city speed: nothing loose, nothing that flaps into the wheels or the neighbouring kart. In winter the wind chill at city speeds is real, and a windproof layer is the difference between an hour of fun and an hour of endurance.
Comfortable clothes you can move in, layers depending on the season, and nothing loose that flaps into the wheels or controls. Costumes are provided and are washed between rides, so the outfit question is mostly about what sits underneath. Socks are worth thinking about if you end up in shop shoes, and a small bag goes into the provided lockers rather than the kart.
The last walk before check-in, documents in the bag. Photo: Bject, CC BY 4.0, via Wikimedia Commons
The Day-Of Timeline From Hotel to Kart
The rides run to a fixed rhythm, and the whole pre-departure sequence fits into the 30 minutes before your start time. Here is how the hour before departure typically plays out.
Riders check in 30 minutes early. At the counter staff verify your IDP booklet, passport and licence in person. You then store your belongings in a locker, choose a washed costume from the shop rail, and sit through a controls-and-rules briefing before the convoy leaves.
Each of those steps has to fit inside the half hour, which is why late arrivals are a real problem rather than a small one.
Check-in closes 30 minutes before the ride on every format in this comparison, and the east loop asks for 20 minutes on top of its own briefing schedule. The window covers the counter check of documents, the lockers, the costume rail and the safety briefing, and the convoy leaves on time whether or not your paperwork is ready. Build the extra half hour into the train plan, and treat the arrival time as the real departure.
- 30 minutes before: arrive at the shop, present documents, check in
- 25 minutes before: locker, costume pick, get settled
- 15 minutes before: controls-and-rules briefing
- 0 minutes: the convoy leaves, and the guide leads from the front
Some listings spell out the arrival window explicitly. The Asakusa, Skytree and Akihabara tour asks riders to arrive 20 minutes before their start time from the Sumida base, slightly tighter than the standard 30. Most departures run through the day with the exact start time shown at checkout, so the timing is in your hands once you book.
For advice on picking the hour itself, see [The Best Time for a Tokyo Go-Kart Tour].
One rule to plan around once you are rolling: cellphones cannot be used while driving. Bring a pocket plan rather than a mount, and let the guide take the photos at the stops. Action cameras can be rented at the shop if you want moving footage.
As one reviewer, Andrew, put it, do not be tempted to take photos yourself, they take them for you.
Groups multiply the paperwork, not the rules. Every driver in a group booking passes the same counter check individually, so the group's departure is only as ready as its least prepared licence. Share the checklist with the group when you book rather than the night before, and let anyone with a translation-country licence start the JAF step early.
Booking Details Worth Double-Checking
Beyond documents and clothes, a few booking details separate a smooth ride from a stressful one. All the tours compared here share the same basics: standard insurance is included in every ride fee, the minimum age is 18 on all listings, and a regular car licence is enough with no motorcycle endorsement needed. Where they differ is price, length, group size and how forgiving the cancellation window is.
Insurance is worth a closer look. The standard cover is included, but one major operator lists the damage deductible at 50,000 yen per kart, about $340 (¥50,000), and sells a full-coverage upgrade. If a scratch would sting at that level, the upgrade is the cheap insurance on the insurance.
More on the safety and cover picture in [Is a Tokyo Go-Kart Tour Safe? Rules, Insurance, Reality].
Here is the full comparison across the catalog, with current prices, durations, ratings and cancellation windows, checked for accuracy against the listings.
| Tour | Price | Duration | Rating | Reviews | Free cancellation |
|---|---|---|---|---|---|
| Shibuya Street Go-Kart Tour | $70 | 1 hour | 4.9 | 1,893 | 7 days |
| Tokyo Tower & Shibuya Crossing Premium Go-Kart Tour | $115 | 1h 15m | 4.74 | 666 | 24 hours |
| Tokyo Bay 2-Hour Go-Kart Tour over Rainbow Bridge | $105 | 2 hours | 4.82 | 112 | 7 days |
| Shibuya Crossing Go-Kart Tour with Photos | $89 | 1 hour | 4.83 | 375 | 24 hours |
| Asakusa, Skytree & Akihabara Go-Kart Tour | $96 | 1h 10m | 4.66 | 783 | 24 hours |
| Akihabara Original Go-Kart Tour | $61 | 1 hour | 4.86 | 127 | 7 days |
The comparison table on this site is a booking instrument, not a brochure: the cancellation column is the operator's own refund window, the group column is the convoy cap, and the price column is the listed per-driver rate. Read the columns before the photos, because the columns are what turn a booking into an actual ride.
The cheapest entry point is the [Akihabara Original Go-Kart Tour] at $61 for one hour through the electric town and the Tokyo Station area. The longest ride is the [Tokyo Bay 2-Hour Go-Kart Tour over Rainbow Bridge] at $105, the only route in the catalog that crosses the Rainbow Bridge. The most reviewed ride is the [Shibuya Street Go-Kart Tour] at $70, which crosses Shibuya Crossing several times from different directions with groups capped at six.
If you want the smallest convoy, the [Shibuya Crossing Go-Kart Tour with Photos] runs at five karts maximum with a 24-hour cancellation window. The [Tokyo Tower & Shibuya Crossing Premium Go-Kart Tour] links Shibuya, Harajuku and Tokyo Tower in 75 minutes and carries the longest free-cancellation protection at 24 hours. The [Asakusa, Skytree & Akihabara Go-Kart Tour] is the east-Tokyo option past Skytree, with a height and weight window that rules out taller and heavier riders, worth checking before you book.
Group size varies from five to eight across the catalog, and departure points sit in Shibuya, Akihabara, Sumida and Shinkiba, so match the base to your hotel.
For a neighbourhood-by-neighbourhood breakdown of where to start from, see [Shibuya vs Akihabara Go-Kart Tours: Which Side to Ride], and for whether the whole thing justifies the money, [Is a Tokyo Go-Kart Tour Worth It? An Honest Verdict].
After the ride, the counter returns what it checked, but the habit worth keeping is the pocket check: licence, permit, passport, back in the same pocket order every time. The shops run a tight counter with the next convoy arriving behind yours, and the travellers who move through fastest are the ones who arrived with the documents in one place.
Three formats carry the strictest document standard and the widest departure choice: the Shibuya street ride, the Tokyo Bay route over Rainbow Bridge and the Akihabara original. Each links to a full page with the licence section repeated at the top, and the best-time guide covers which slot to book once the papers are ready.
East-side check-ins start near the temple streets. Photo: jreysp, CC BY-SA 4.0, via Wikimedia Commons
Checklist Questions, Answered
The questions below come up most often in the days before a booking. Each answer sticks to what the listings actually state.
Checklist Questions, Answered
What documents do you need for go karting in Tokyo?
You need a 1949 Geneva Convention format International Driving Permit as the physical paper booklet, plus your passport. Drivers from Switzerland, Germany, France, Taiwan, Belgium, Monaco or Slovenia need an official JAF Japanese translation of their domestic licence instead. All documents are checked in person at the counter.
Do I need my passport for go karting in Tokyo?
Yes. Your passport is part of the document check at check-in, alongside the IDP booklet or JAF translation. Leave it in a hotel safe at your own risk on the day, because staff verify the physical documents before you can join the ride.
What should I wear for a Tokyo go-kart tour?
Wear closed flat shoes such as trainers. High heels, sandals, flip flops and slippers are banned, and one listing adds long skirts to the caution list. Costumes are provided from the shop rail and are washed between rides.
How early should I arrive for a Tokyo go-kart tour?
Arrive 30 minutes before your start time. Check-in, document verification, lockers, costume pick and the safety briefing all happen in that window. One listing, the Asakusa, Skytree and Akihabara tour, asks riders to arrive 20 minutes before from the Sumida base.
Can I show a photo of my driver's license in Japan?
No. Online copies, photos, photocopies and card-style licences are named invalid on the listings and are rejected at check-in. Only the physical paper booklet signed by the holder is accepted, and drivers without it cannot join the ride and receive no refund.
What gets you turned away from a Tokyo go-kart tour?
Wrong paperwork is the main reason, including a missing IDP booklet, a 1968 Vienna Convention permit, or a licence from a country such as China or Mexico that cannot be used in Japan under any paperwork. Banned footwear and being under 18 also stop you at the shop. In every case the booking is non-refundable.
A Five-Minute Pre-Flight Paperwork Ritual
Run this check the week before the flight, while there is still time to fix what it finds. Take out the licence, the permit booklet and the passport, and lay them side by side. The permit must be the 1949 Geneva booklet format, signed, unexpired, and issued by the motoring organisation of the same country that issued the licence.
The licence must be the physical card or paper, not a photo. The passport must be the physical booklet and match the licence's country.
Then check the exception lists once. If the licence was issued in Switzerland, Germany, France, Taiwan, Belgium, Monaco or Slovenia, the permit stays home and the JAF translation travels instead. If the licence was issued in China, Indonesia, Mexico, Qatar or Saudi Arabia, no paperwork combination allows street driving in Japan, and the honest move is to book an indoor karting track instead of a street ride.
- Permit booklet: 1949 format, signed, unexpired, matching country
- Licence: physical card or paper, no photos
- Passport: physical booklet, matching the licence
- JAF translation instead of the permit, for the seven translation countries
- Booking email on the phone, and the shop's address saved offline
One last habit for the day of the ride: screenshot nothing, print nothing, and instead put the three physical documents in one pocket of the bag you are actually taking. The counter check moves at the speed of the slowest pocket, and the travellers who enjoy the costume rail are the ones whose paperwork took ten seconds to produce.
What the Platform Shows and What It Does Not
The booking platforms are good at prices, slots and ratings, and quiet about the counter. The licence rule appears on every listing, but the depth of the rule sits in the operator's own pages and the official sources behind them, which is why this checklist exists. Treat the platform as the checkout and the checklist as the pre-checkout, and nothing at the counter should be a surprise.
The one platform detail worth reading twice is the cancellation column, because it differs by listing rather than by platform: some formats refund up to 24 hours ahead, others need seven days, and the difference is the operator's own policy. Pair that with the reserve-now-pay-later flag where it exists, and the booking page tells you exactly how committed you are at the moment of payment.
Insurance upgrades ride the same page. The standard cover is included and the deductible applies to kart damage, and the upgrade that removes it is offered at booking or at the shop. Decide before you arrive: the shop counter is the wrong place to weigh a decision that costs about the same as a souvenir.
Insurance, Upgrades and the Damage Question
Every ride fee includes standard insurance, and every listing is upfront that kart damage is the rider's financial problem up to the deductible. One major operator prints the number, about 50,000 yen per kart or roughly $340, and offers a full-coverage upgrade at booking or at the shop that removes the deductible entirely. The other listings state the included cover without publishing their deductible figures, which is a reason to ask at check-in rather than a reason to worry.
The upgrade decision is a five-second risk calculation. A first-time street rider in a five-to-eight-kart convoy on narrow roads is exactly the profile the full coverage was priced for, and the upgrade costs less than the deductible it removes. Experienced riders who already know the format sometimes skip it, and the honest middle ground is to take the upgrade on your first ride and decide again afterwards.